# Guide
This guide will teach you how to compile and add the plugin to a new Godot engine project .
TIP
Try a demo of the plugin here
# Prerequisites.
For the development of this guide, we must have the following installed in our system:
TIP
- Godot engine 3.x
- Compilador C++
- Scones build tool
- Emscripten 2.0.17 build tool (In case of building for web "wasm").
# Preliminary settings.
Before continuing with the process, it is important to note that for convenience, we can create an alias for the command "emcc" and "em++" provided by "emscripten", we do it as follows.
$ echo 'alias emcc="path/to/your/emscripten/emcc"' >> ~/.bashrc
$ echo 'alias em++="path/to/your/emscripten/em++"' >> ~/.bashrc
For more information on how to download and install emscripten, visit their official page (opens new window).
If you do not choose to make this setting, and wish to compile a web version of the plugin, follow the instructions in Problems compiling.
# Clone Repository.
WARNING
It is likely that you will find differences between the original repository and this repository, if you are going to use the original "tterrasson" repository , I recommend that you follow the instructions you will find there, since there may be differences in how the plugin is installed.
Original Repository.
$ git clone --recurse-submodules https://github.com/tterrasson/liquid-simulator-godot
This repository.
$ git clone --recurse-submodules https://github.com/AJ-Wi/liquid-simulator-godot
# Compile binary.
In this section we will see how to compile both the godot-cpp binary and our plugin.
TIP
In the following commands we must replace "<os>" with the platform on which we want to run our game:
- windows
- linux
- osx
- javascript
- andorid
# godot-cpp binary.
We need to compile the godot-cpp binary according to the platform on which we want to run our game, for this we must be positioned inside the godot-cpp folder in our terminal.
$ cd liquid-simulator-godot/godot-cpp
$ scons platform=<os> generate_bindings=yes
# plugin binary.
Once the godot-cpp binary is compiled, we return to the root folder of the project and compile the plugin.
$ cd ..
$ scons platform=<os>
# Copy the plugin to your project.
At this point you will find the compiled plugin in the "bin" folder of the project, you just need to copy this folder to the "addons" folder of your project, and rename the plugin folder as "liquidsim" , you can also execute the following command.
$ cp -r bin/* /ruta/a/tuproyecto/addons/liquidsim
You should be left with the following file structure in your project.
.
tuproyecto
    ├── addons
    |    └── liquidsim
    |        ├── assets
    |        |   ├── icon.png
    |        |   ├── lava.png
    |        |   └── water.png
    |        ├── lib
    |        |   └── `libliquidsim.so` (according to the one you have compiled.)
    |        ├── LiquidSim.tscn
    |        ├── liquidsim_plugin.gd
    |        ├── liquidsim.gdnlib
    |        ├── liquuidsim.gdns
    |        └── plugin.cfg
    ├── default_env.tres
    ├── icon.png
    ├── project.godot
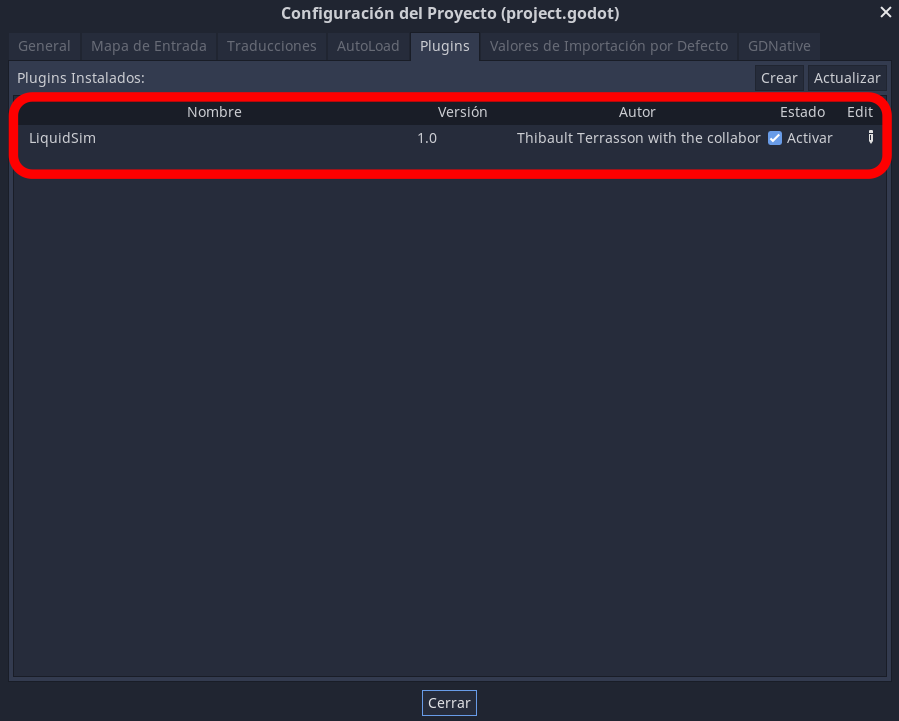
# Activate the plugin.
To do this, you access the configuration of your project and "LiquidSim" will appear in the plugin section, you just have to activate it.
# Add Node.
Once activated, the plugin already appears in the list of nodes in the editor.
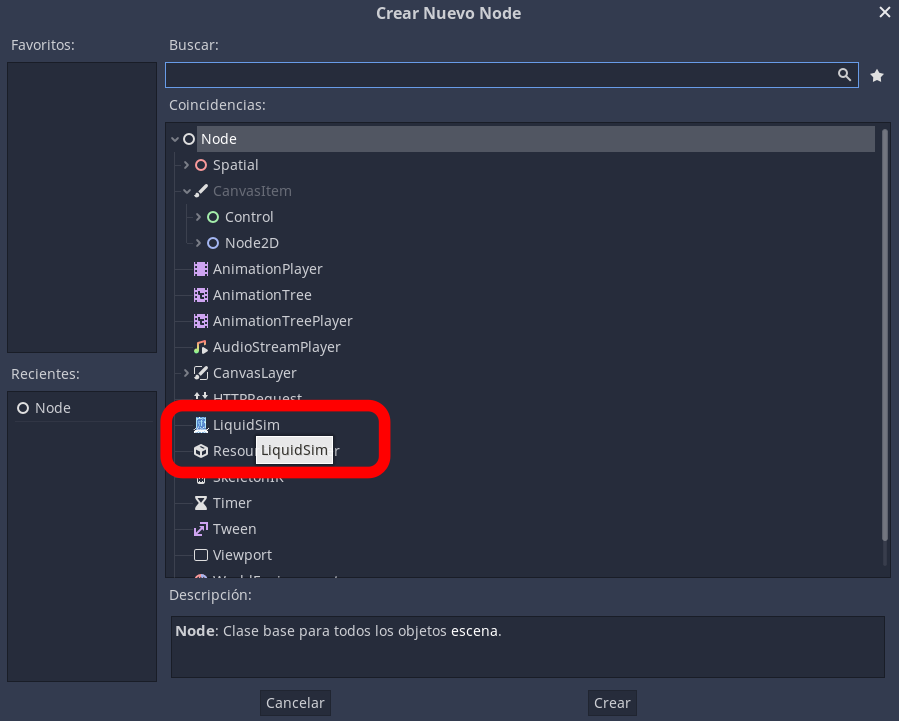
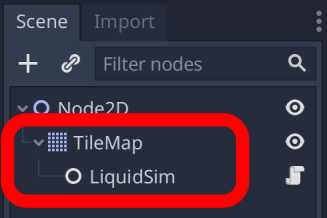
For our new node or plugin to work, we must add it as a child node of a "TileMap".
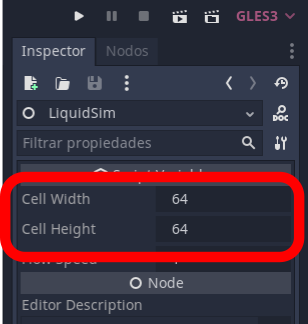
# Plugin setting.
Adjust the size of the plugin cells according to the cell size of your "TileMap".
# Try the plugin.
Attach a gdscript to the "TileMap" to test the plugin, you can use the following sample code.
extends TileMap

func _ready():
	pass # Replace with function body.

func _input(event):
	if event is InputEventMouseButton:
        # Mouse in viewport coordinates
		var wpos = world_to_map(get_global_mouse_position())
		$LiquidSim.add_liquid(wpos.x, wpos.y, 10.0)
# API.
$LiquidSim.start() : Starts the simulation (Started by default)
$LiquidSim.stop() : Stops the simulation
$LiquidSim.update_simulation() : Force simulation update
$LiquidSim.cleanup_empty_cells() : Clean all empty cells (automatic)
$LiquidSim.add_liquid(int x, int y, float amount) : Adds some liquid to the cell.
$LiquidSim.del_liquid(int x, int y) : empty a cell
$LiquidSim.set_liquid(int x, int y, float amount) : Set a fixed amount of liquid to the cell
$LiquidSim.get_liquid(int x, int y) float : Returns the amount of liquid the cell has.
# Compiling problems.
As mentioned at the beginning, if you are working with the "original" (opens new window) version of the plugin, follow the instructions in that repository.
In case you continue working with the version of this repository, I will leave you with a tip or solution to a problem that I encountered along the way and my experience will probably help you.
TIP
At the time of compiling the plugin for the web version, I found that the script "SConstruct" did not contain the necessary code fragment for this task, I got in the repositories of "godot-cpp" a bash script to compile to the html5 version, however, that compilation gave me a lot of trouble, and even with little information to fix it, the "godot" documentation's recommendation, as to the version of "Emscripten" is 1.39.9, after many attempts and research I was able to conclude that for the compilation of this plugin the version of "Emscripten" that we should use is 2.0.17, and for greater comfort Add the missing code snippet for this operation to the "SConstruct" file, so that we can directly run the "scons" command.
WARNING
In case you don't have an alias for the "emcc" and "em++" commands, you must add the "emscripten" attribute to provide the path of our build tool, here it is An example:
$ scons platform=javascript emscripten=/usr/bin/emscriptem/
For more details, see "Using GDNative Module" (opens new window)